

Choosing cycling shoes is less about buying the most expensive pair and more about matching the shoe to your riding, pedals and foot shape. A stiff race shoe can be excellent on the road but frustrating on a gravel ride that involves walking. A comfortable mountain-bike shoe may be ideal for commuting but unnecessarily heavy for fast road riding.
1. Choose the Right Type of Cycling Shoe
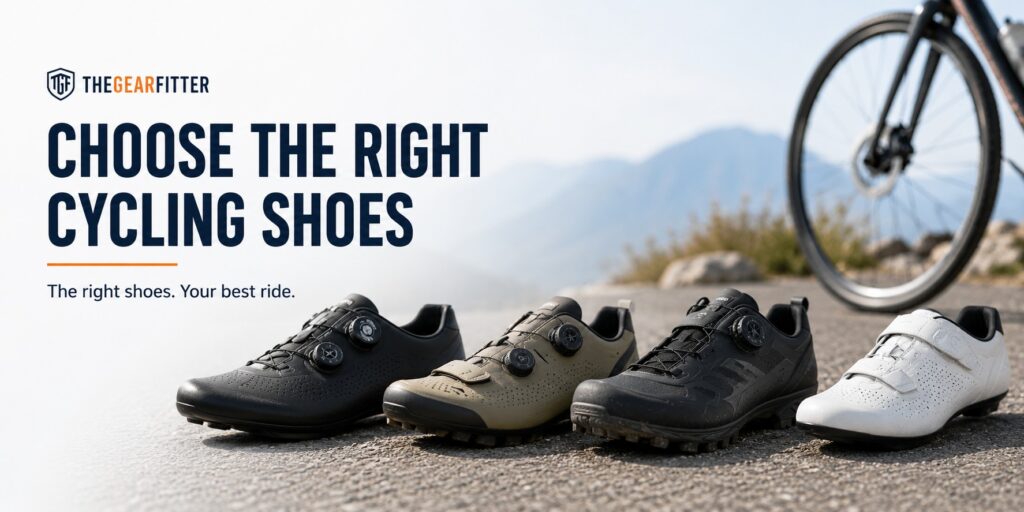
Road cycling shoes
Road shoes usually have smooth, very stiff soles and use a three-bolt cleat system. They are designed for efficient pedalling on paved roads, but exposed cleats and limited tread make walking awkward.
Gravel cycling shoes
Gravel shoes normally use recessed two-bolt cleats. They combine a reasonably stiff sole with enough tread for short walking sections, café stops and loose surfaces. They are a practical choice for mixed riding.
Mountain-bike shoes
MTB shoes add grip, protection and durability. Clipless versions normally use recessed two-bolt cleats, while flat-pedal shoes use sticky rubber rather than cleats. They are best when technical terrain and off-bike traction matter.
Indoor cycling shoes
Indoor shoes prioritise ventilation and easy adjustment. Some use two-bolt cleats, others accept three-bolt cleats, so always check the studio’s pedal system before buying.
For a direct comparison, see our guide to road, gravel, MTB and indoor cycling shoes.
2. Check Cleat and Pedal Compatibility
The shoe must accept the cleat required by your pedals. The two most common layouts are:
- Two-bolt: commonly used for Shimano SPD-style gravel, MTB, commuting and many indoor systems.
- Three-bolt: commonly used for road systems such as Shimano SPD-SL and Look-style pedals.
A recessed two-bolt cleat is easier to walk on. A three-bolt road cleat creates a broad pedal platform but sits outside the sole. Some shoes accept both patterns, but many do not.
3. Get the Fit Right
Cycling shoes should feel secure without crushing the forefoot. Your heel should remain stable when pedalling, the midfoot should not slide, and your toes should have enough room to relax.
Do not judge fit only by length. Two shoes in the same EU size can differ considerably in:
- forefoot width;
- toe-box shape;
- instep height;
- heel width;
- overall internal volume.
A rider with a wide forefoot and narrow heel needs a different shape from someone with a uniformly wide, high-volume foot. Use our Bike Shoe Fitter to compare shoes by discipline and foot width.
4. How Much Toe Room Do You Need?
Your toes should not touch the front under normal pedalling, but cycling shoes do not need the generous space found in running shoes. A small amount of room is useful because feet can swell during longer or hotter rides.
If the shoe feels comfortable only when the closure is left very loose, the last is probably too narrow or too shallow. Sizing up may add unwanted length without solving the shape problem.
5. Choose an Appropriate Sole Stiffness
Stiffer soles reduce unwanted flex and create a direct feel at the pedals. That can be useful for racing and hard efforts, but maximum stiffness is not automatically best for every rider.
- Recreational riders: a moderately stiff nylon or composite sole is usually sufficient.
- Long-distance riders: stiffness should be balanced with comfort and pressure distribution.
- Racers: a carbon sole may provide a lighter and more direct platform.
- MTB and gravel riders: some controlled flex can improve walking comfort.
See our comparison of carbon and nylon cycling-shoe soles for more detail.
6. Choose the Closure System
BOA-style dials
Dials allow small adjustments and are easy to tighten while riding. The exact performance depends on the placement of the dial and cable routing, not only the presence of a BOA label.
Velcro straps
Velcro is light, simple and affordable. It works well for beginner and indoor shoes, although adjustment is less precise.
Laces
Laces distribute pressure smoothly and create a clean fit, but they are difficult to adjust while riding. They should be secured so they cannot reach the drivetrain.
7. Consider Ventilation and Weather Protection
Highly ventilated shoes are comfortable in warm conditions and indoor sessions but can become cold in winter. Heavier uppers and reduced mesh provide more protection, although no standard cycling shoe is completely waterproof.
If you ride year-round, shoe covers or winter-specific footwear may be more practical than trying to make one highly ventilated summer shoe do everything.
8. Do You Need Expensive Cycling Shoes?
Premium shoes usually offer lower weight, stiffer soles, finer adjustment and more refined uppers. Those features can be valuable, but they cannot compensate for poor fit.
A well-shaped mid-range shoe is often a better purchase than a premium shoe that creates pressure points. Beginners should prioritise compatibility, fit and practical use before chasing marginal weight savings.
Final Checklist
- Match the shoe to road, gravel, MTB or indoor use.
- Confirm two-bolt or three-bolt cleat compatibility.
- Choose the correct width and foot volume, not only the length.
- Look for secure heel hold without forefoot pressure.
- Select sole stiffness for your riding level and comfort needs.
- Choose a closure system you can adjust easily.
Bottom line: The best cycling shoe is the one that works with your pedals, matches your riding and fits your foot securely without numbness or hot spots. Start with those three requirements and the remaining choices become much easier.